Nail Art

Ombre Glitter Nails with Dip Powder
You’re familiar with gradient nails where two shades fade into one another. This seamless style is making a comeback with baby boomer nails, a trend from the 1940s. It’s an easy look to create with polish...
Learn more
3D Water Droplet Nails: A Trend That's Making a Splash
Have you seen Kylie Jenner's and Kerry Washington's exquisite water droplet nails? Those 3D designs are incredibly lifelike! Sure, they had professional nail artists to do their manicures. But it turns out that water drop nails aren’t hard to create...
Learn more
Stars Nail Designs to Add Magic to Your Outfit
Are you searching for stars nail designs to add magic to your outfit? That’s a perfect choice because star nails are trendy and timeless. Moreover, there are so many ways to personalize them. Star nails can be simple or intricate, low-key or stunning. You can put a whole galaxy on your fingertips or add a few shooting stars as accents. Here are our favorite starry nail manicures to inspire you. Top 12 Stars Nail Designs Sugary Stars We love these tastefully done nails with textured half-stars that resemble sugar-coated gummies. The muted colors counterbalance the big design. Then, the tiny white dots on the soft pink background tie it all together. Gold Stars in a Chrome Sky This design makes us think about superheroes or the Fourth of July. It's surprisingly easy to do at home, especially if you have chrome powder and star nail stickers. We especially love how some stars go right up to the edge of the nail as if they were part of a larger picture. Black Stars and Glitter Tips Here’s another stars nail design to do at home. You’ll need a neutral shade for the base, glitter polish for the tips, and a scattering of star stickers in different sizes. If you want your manicure to really look out of this world, use flash glitter gel for the tips. Dreamy Cloud Tips With Gold Stars Isn’t this variation of a French manicure just adorable? It’s so elegant yet fun! What’s more, it’s easy to give the stars a 3D texture. You don’t need acrylics or builder gel. Instead, paint them with emboss gel. It’s a thick, highly pigmented polish that has a touchable texture when it cures. (You’ll need a nail lamp to use it.) Then seal everything with a high-gloss top coat. High-contrast Stars This bold twist on the classic French manicure is sure to draw attention. While the neutral shades go with any outfit, the daring design gives the nails plenty of flair. If you need more confidence about hand-painting stars, use a stencil or nail striping tape. Either way, remove the drawing aid before drying or curing the polish. Summer Fun Star Nails Neon nails are perfect for summertime. This star-studded design is playful and ready to party. Keep your manicure looking new for longer and protect your nails with strengthener, gel base, and diamond top coat. And remember moisturizer after enjoying the pool or the beach. Lavis cuticle oil is our favorite brand because it’s fast-absorbing, nourishing, and comes in so many delicious scents. Black Nails With Starry Accents How did they make it look like the stars were embedded in the glossy black polish? It's like they are peeping through it. The trick is to add an extra coat or two of glossy top gel for the illusion of depth. Starred and Marbled Nails Here are lots of tiny stars with a waxing crescent moon. The blue marbled background is pretty, but we wonder what would’ve happened with cat eye polish instead. The reflective pattern might have been even more mesmerizing. If you haven’t tried magnetic cat eye polish yet, this brief video shows how it’s done. Glow-in-the-dark Star Nails Yes, glow-in-the-dark polish exists. These brightly-colored gels are hypnotic in the dark and under different types of light. Moreover, the super glossy finish lasts for 3 weeks. Constellation Nails Have your star nails show off your favorite constellation or zodiac sign. Celestial nails don't have to be complicated. This design uses black and white polish, a dotting pen or fine nail art brush, and a matte top coat. Bright Stars and Pink Clouds This delicate design has the clean aesthetic look that’s so hot right now. Plus, milky pink nails and cloud nails are both popular styles, so you'll get the trendiest nail styles in one manicure. Galaxy Nails You can do this look with three shades of polish, makeup sponges, and a thin brush. Sponge the blue and black polish on the nail. Then combine white and blue to make light blue for the cloudy parts. Finish with the nail brush and bright white polish for the stars and moon. Remember that you’ll get better results if you take the time to properly prepare your natural nails first. Trim, shape, and buff them and push back the cuticles. Remove natural oil with acetone or rubbing alcohol and a lint-free wipe. Then use a base coat to protect against staining and strengthen the nails. When you finish the design and apply the top coat, cap the tip of the nail to guard against chipping. Help: I Can’t Decide Which Stars Nail Design to Try First We don’t know about you, but we get enthusiastic when we see so many pretty manicures. We want to try them all! How can you decide which design to wear first? Our first suggestion is to think about upcoming events. If you have a vacation or some other fun activity planned, you may wish to match your manicure to what you'll wear or do. Next, think about your skin tone and the colors you prefer to wear. If you like a particular design, you can always change the shades to suit. Then, consider the statement you want to make. Are you in the mood for something bold, or do you prefer something subtle? Star nail designs can go either way. As you'll recall, nail lacquer lasts about a week, but gels last two or three times that. Will this be a manicure you'll cherish or something to flirt with on a starry night? Conclusion Did you enjoy these stars nail designs to add magic to your outfit? There are so many different ways to personalize them. We wish we could see what you come up with! While you're here, visit our new arrivals page to view other exciting trends in the nail world. Remember to get the most from our deals and enjoy free delivery on orders over $100!
Learn more
How to Do Seashell Nails?
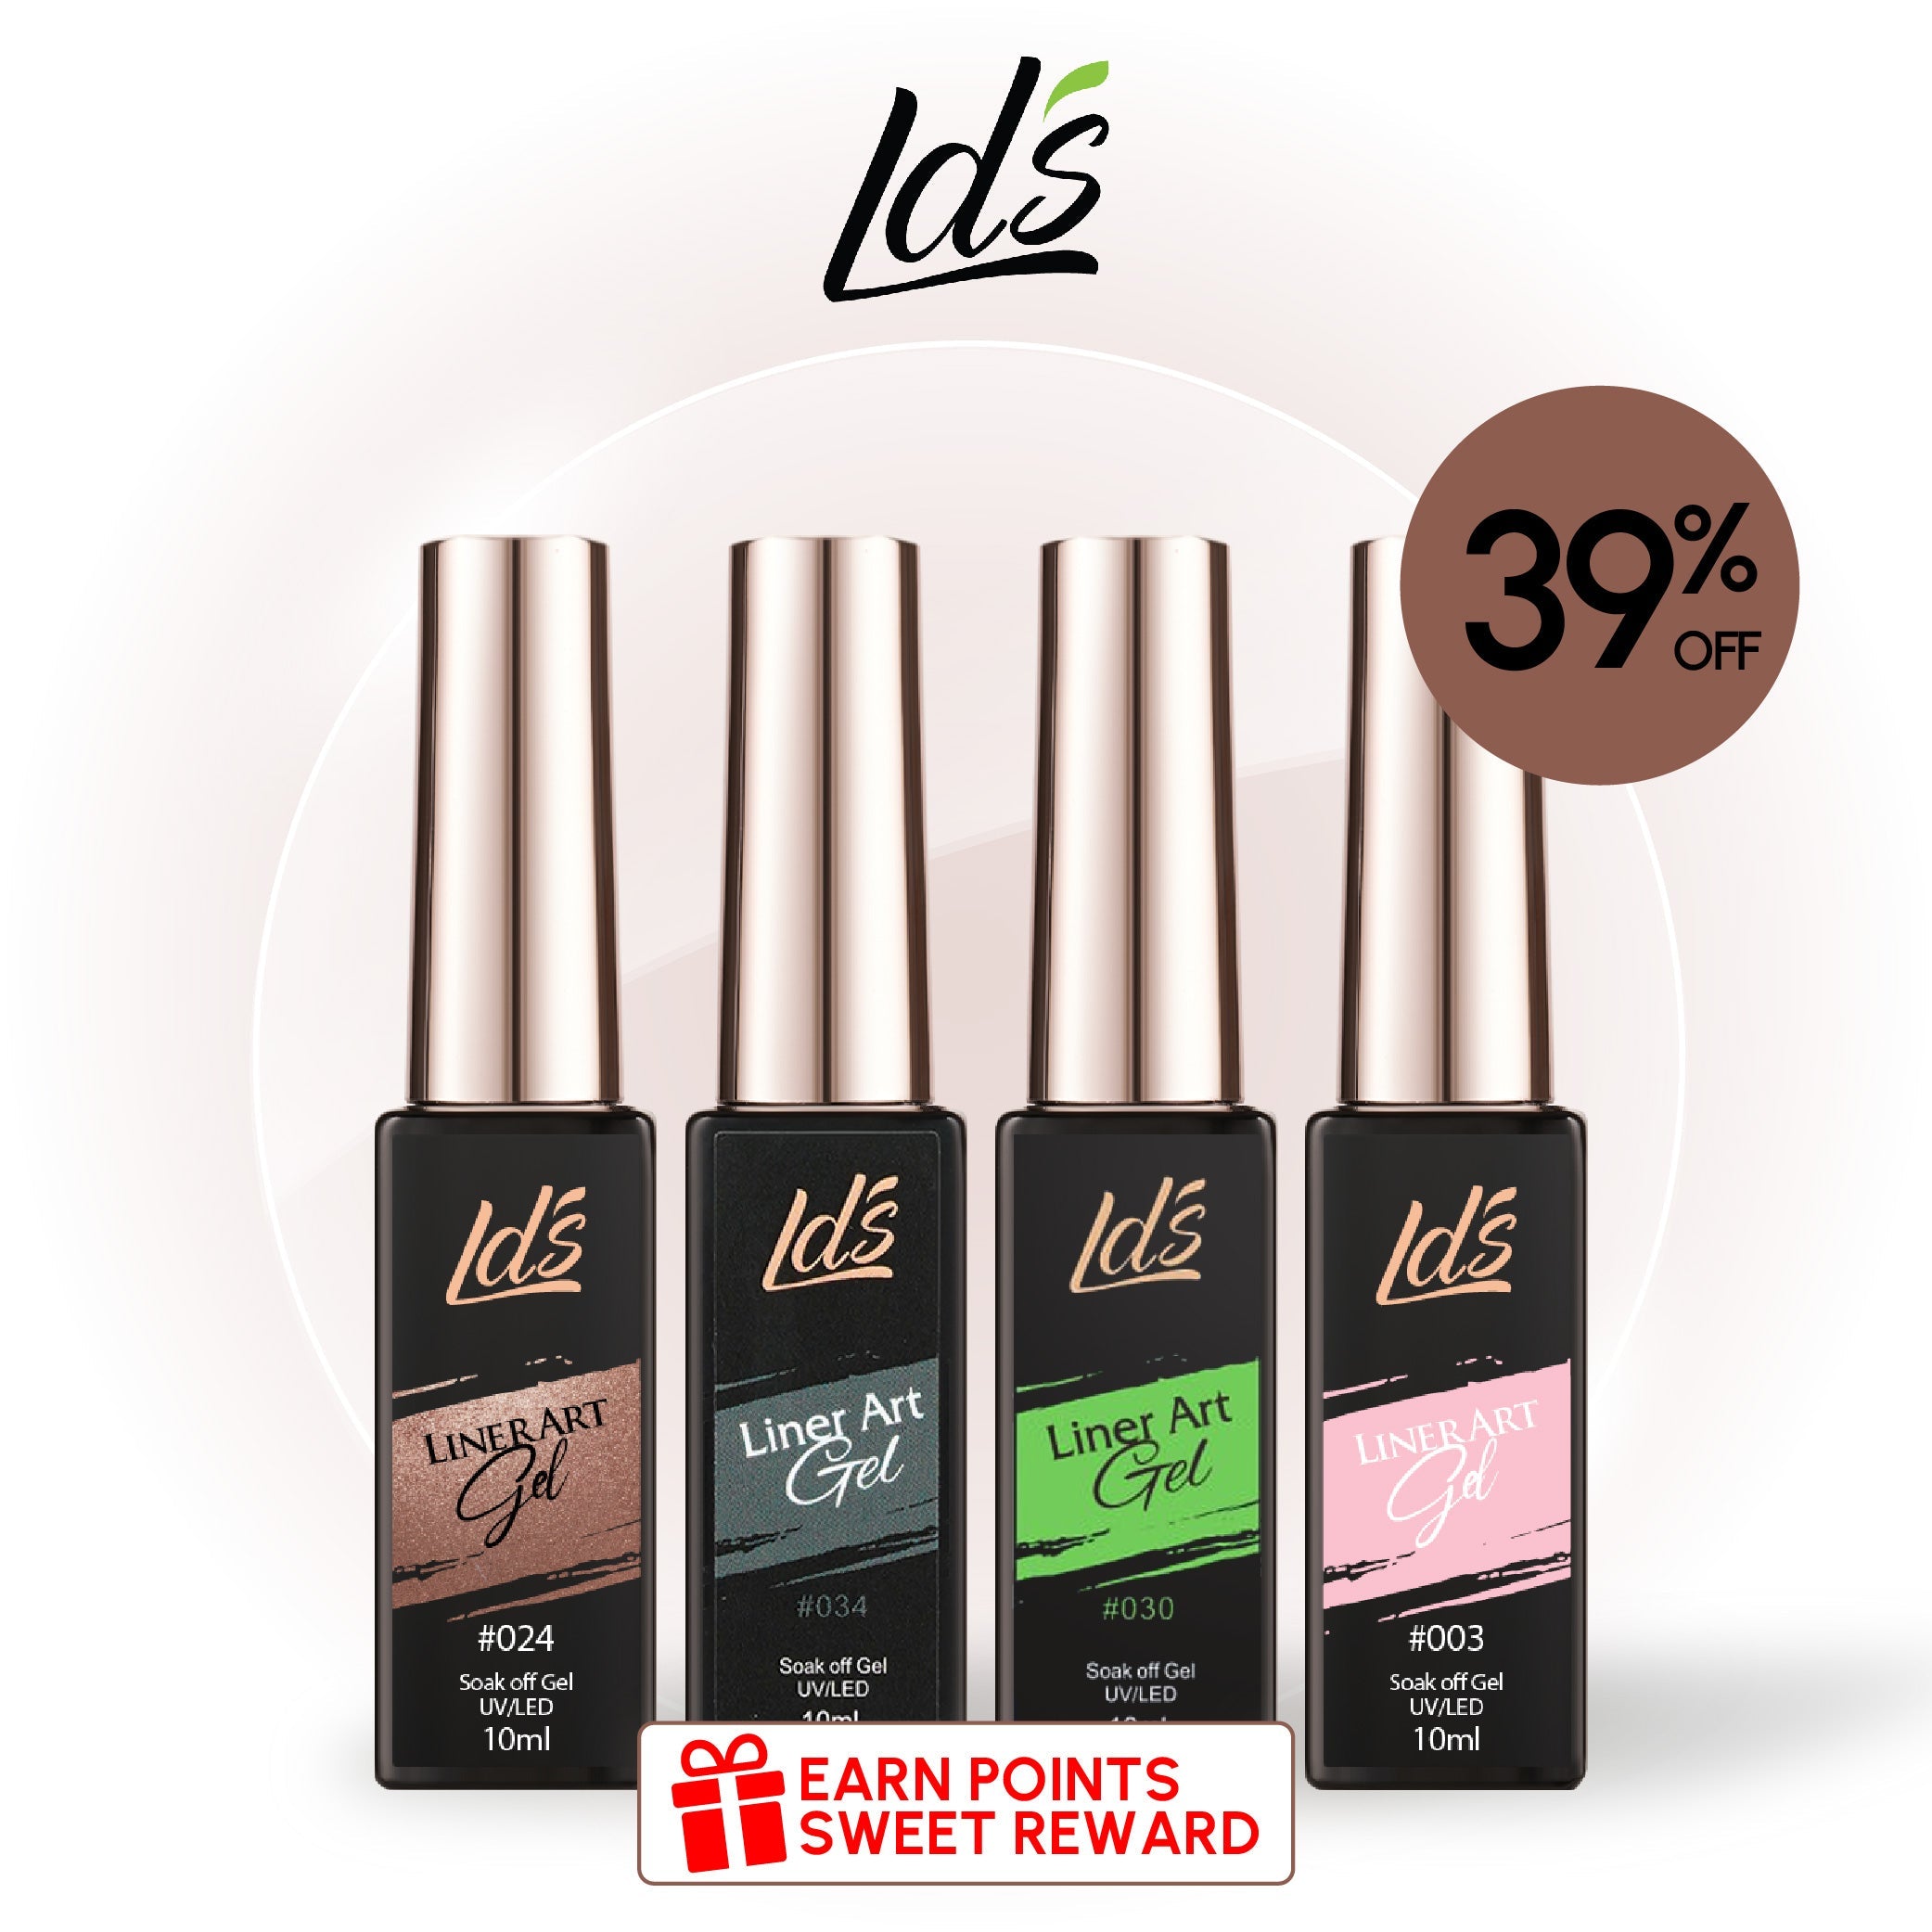
Even if you’re not a mermaid, it’s hard to resist beautiful seashell nails. Maybe you’re daydreaming about a seaside vacation or want to show your love for the ocean. No matter the reason, there are different ways to get a seashell look for your manicure. Some tutorials suggest a simple iridescent finish that looks like mother-of-pearl. This is similar to what Halle Bailey wore in The Little Mermaid. Meanwhile, others create a texture that mimics the outside of a shell. It doesn't sound very easy until you realize you don't need acrylics or builder gel to get the look. And then there’s the group that goes full mermaid-core with tiny pearls, starfish, and other sea treasures. Curious? Then, let’s talk about how to do seashell nails. Supplies Needed for a Seashell Mani While you can certainly do a seashell manicure with nail lacquer, gel polish provides more benefits. That’s why our tips for how to do seashell nails focus on gels. Gel polish, unlike lacquer, is low-odor. Moreover, it doesn't dry until it's cured in a nail lamp. That fact gives you plenty of time to perfect the design. It also lets you remove that layer and start over if you're unsatisfied without undoing the rest of your manicure. With that said, let’s look at the best nail products for a seashell mani: LDS Gel Base, Diamond Top, Strengthener BUY NOW 3-in-one set with a base coat, glossy top coat, and a nail strengthener. Lavis Matte Top Gel BUY NOW A matte but not flat finish for a realistic seashell effect. Line Art Gels BUY NOW The easiest way to do precision nail art – they come with a thin brush in the bottle. Nail Art Brush BUY NOW Unleash your inner artist and turn any polish into a work of art. Chrome Powder BUY NOW Assorted chrome colors for an iridescent finish on mermaid or mother-of-pearl nails. Nail Lamp BUY NOW The essential tool for drying gel polish, builder gel, and gem gel sealer. Gem Sealer BUY NOW Make sure rhinestones, nail charms, and pearls stay put with this gel adhesive. Lavis Cat Eyes Gel Polish under the Sea Collection BUY NOW Dreamy shades with the shimmery, reflective look of the cat's eye. This magnetic gel polish makes for magical manicures. Moreover, it looks new for weeks but soaks off in minutes. DND DC Mermaid Collection BUY NOW Bold colors with mirror powder for a soft sparkle. Builder Gel OR Acrylics BUY NOW The ultimate ingredients for textured 3D seashell nails. How to Do Seashell Nails Before you do seashell nails, find an image to use as a reference. A visual representation of your desired outcome can help you achieve your goal. Here's one example of seashell nails: This design is straightforward and can be done with gel polish only. Begin by prepping the nails. Be sure to push back the cuticles and lightly buff the nail plate to remove the shine. Cleanse debris and oil, then apply a base coat and cure it. Decide upon a color scheme for the shells. A popular choice is off-white and beige for a realistic look. You may prefer white on white or rosy pink. Brush on the base color and cure it. Then use a thin nail art brush to draw lines across the nails from the cuticles to the tips. Don't fret if they aren't perfectly straight because you can neaten them up later. For the best results, flare each line as it reaches the tip. (Depending on the brush size, you can probably fit 5 or 6 lines.) Cure that layer and repeat to build up the texture as much as you like. After the last layer is cured, you can gently straighten the lines with a fine-grit nail file. Then apply a top coat to protect your hard work. Those are the basics for doing seashell nails. Now, let’s take them to the next level. For instance, you can use a matte top coat instead of a glossy finish for a sophisticated and realistic look. Alternatively, you can use chrome powder or a shimmery polish as the base color for a subtle sparkle. You might even love an iridescent finish over the entire nail accompanied by rhinestones or pearls. Go ahead and get creative because nail art is fun! The Easiest Way to Do Seashell Nails Instead of replicating the outside of the seashell, it’s easier to copy the inside. The elegant, pearlescent finish inside a shell is simple to mimic with polish and chrome powder. After you apply and cure the base coat and colored polish, use the sponge applicator and the chrome powder to shine up the surface. Then seal everything with a glossy top coat. And if you want an effortless manicure, just use a lustrous polish like OPI’s Kyoto Pearl. It has a lovely iridescent shimmer like abalone. How to Do 3D Seashell Nails If you’ve ever searched for a mermaid manicure, you’ve seen seashell nails like these: How do they get that perfect seashell texture? In this case, the artist used acrylic powder. In other situations where the shell looks translucent, it might be builder gel. Either way, those methods are tricky if you’ve never worked with the tools before. Furthermore, each one uses a different technique to shape nail art. If you're interested in trying acrylics or hard gel, many tutorials can help you get started. Another option is to look for press-on nails shaped like seashells. Most can be painted, so you can customize them before you apply them. What’s more, you can add charms and stones with nail glue or gem gel. Lastly, we’ve seen artists use crushed seashells or actual tiny shells to decorate nails. Talk about realism! Conclusion What type of seashell nails are you going to try first? Will you brush on a pearly polish or glam up your nails with genuine pearls? The matter what, we bet you’ll make the mermaids jealous! Get the most from our deals to stock up on all the supplies you need today. Remember, we offer complimentary gifts on orders over $35, plus free delivery for shipments over $100!
Learn more
The 14 Pretty Ocean-inspired Nails You Will Love To Copy 2025
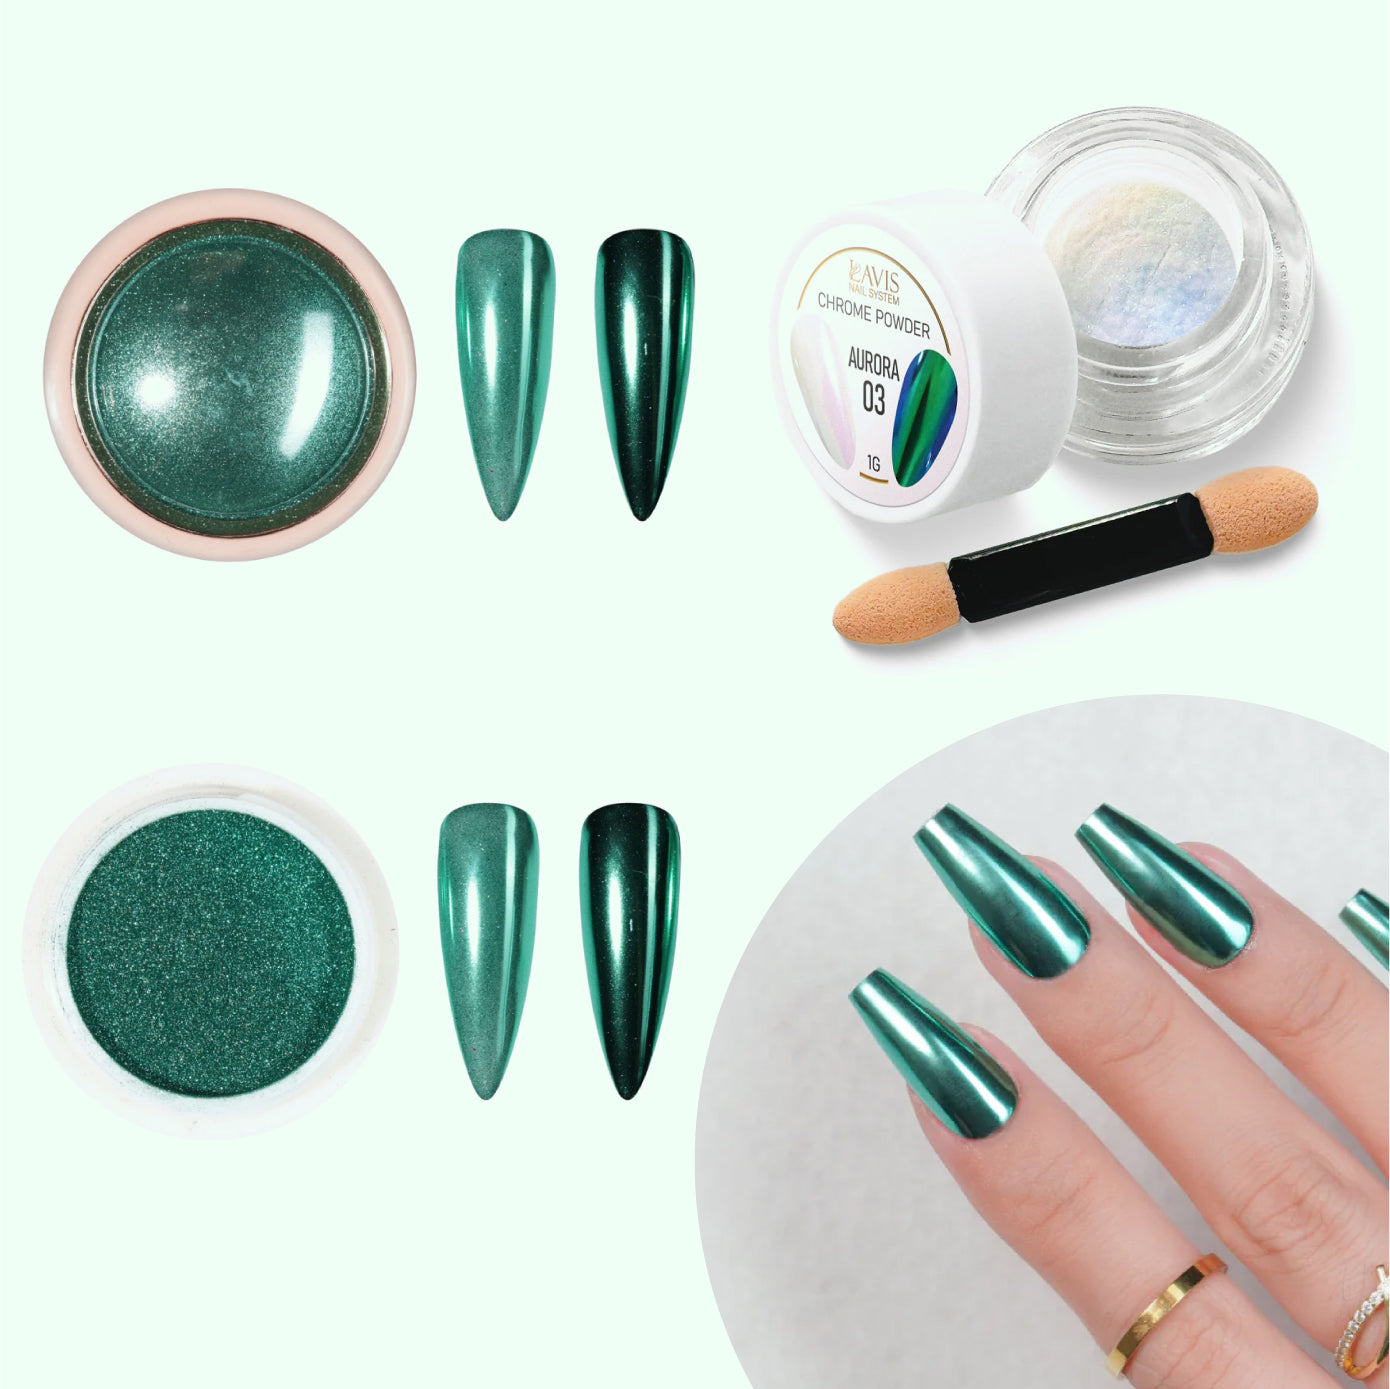
Would you like to escape the hustle and bustle of everyday life and just relax on a beach? Now you can keep the seashore at your fingertips with pretty ocean-inspired nail designs. There are many creative ways to show off your love for the sea with stunning ocean nail art ideas. From beachy waves to mermaid scales and even sharks, these nautical nails will give you a tidal wave of inspiration for your next manicure. Top 14 Pretty Ocean-inspired Nails Acrylic Ocean Nails Surfers at the North Shore would be stunned by these gorgeous ocean nails. They are acrylics that are not easy for beginners to pull off. However, the nail artists at your local salon may be up to the task. Show them the image and see what they think. Remember, you can customize them to different lengths and shapes, too. Beach Nails There's nothing like relaxing on a sandy beach with frothy waves lapping at your feet. This look includes at least three shades of polish, including soft beige, white, and ocean blue. The blue can be diluted with the white for a lighter hue. Then top it all off with a matte top coat. By the way, the almond shape makes these nails both trendy and comfortable for wearing on vacation. Seaside Sparkle Although the glitter clamors for attention, don’t miss out on the hints of purple amongst the waves. Tools to Help You Do Ocean Nails at Home Let’s pause for a moment to show you the best polish and accessories to do ocean-inspired nails at home. First, blossom gel is the secret to marbled waves. It’s easy to use if you’re familiar with gel polish. After you apply the base coat and cure it, brush on the blossom or “blooming” gel. Before you cure it, add a drop or two of colored polish. The color will blossom across the nail. You can alter how it looks and make ocean waves with a brush. Here’s a video that shows how to use blossom gel. Next, beach nails often feature a pearly or iridescent finish. That’s easy to get in one step with Opal Pearl gel. With three dozen shades to choose from, there’s no end to the mermaid magic you can create. Moreover, we love Flash Glitter gel which comes in two dozen colors. Each one has a different reflective effect depending on the lighting. But when it comes to details like adding a coral reef or fish to your manicure, nothing beats line art gel for precision nail art. And if you still need to gain the confidence for hand-drawing nautical themes, there are lots of nail stickers that can help. Also, check out the nail charms and rhinestones to find the perfect accent. Lastly, you don't need gel polish to do ocean nails. There are many beautiful nail lacquers in ideal shades for a maritime manicure. Charming Seaside Nails Yes, you can hand-paint the ocean for this look. But you can also find stickers that imitate the sunlit water. What’s more, a makeup sponge can create the frothy white edge of the waves. Japanese Ukiyo-e Nails This manicure is done in the style of Japanese woodblock prints. For all we know, it could've been done by hand. But we've also seen nail stickers that can produce a similar result. Then you only need an opaque neutral base in a natural shade and a matte top coat. Gradient Ocean Nails You might also call these mermaid nails or ombre ocean nails. If you’ve never done a gradient design, it’s actually pretty easy. Check out this video for tips on how to blend colors seamlessly. Shark Nails The much-misaligned shark is an essential player in a healthy ocean. When you wear an ocean-inspired manicure with sharks, starting a conversation about conservation and protecting the wildlife in our seas is easy. Whale Nails These cute cetacean-themed nails don't require extensions to look adorable. It's easy to get the clean-edged stripes with nail tape. Then, you can use stencils or stickers to do the whales. Finally, a nearly dry brush with a dab of white polish creates the spray. Stamped Ocean Nails Nail stamps make it quick and easy to do all sorts of designs, like sea turtles and seahorses. Embossed Ocean Nails How do they get the raised texture on top of these pretty pastel gradient nails? The white starfish and seaweed might be painted with embossing gel. Ocean Nails with a Palm Tree Here’s a maritime-themed twist on French tips. We love these milky pink nails with waves lapping at the ends. They look just like a hazy day at the seaside. Plus, the palm tree accent nail is perfect. Treasure of the Sea Nails Beautiful shells are often prized as treasures, as are pearls and bits of colorful sea glass. This mermaid-worthy manicure is elegant, sophisticated, and definitely inspired by the ocean. Sparkly Ocean Nails Square nails are a 90s trend that’s coming washing back ashore. We like what the artist has done with them here. The gradient blend with a glittery top coat hints at an ocean theme while still embracing nostalgia for blue nails. Tropical Glitter Tips Here's a quick and easy manicure to do at home. You'll need transparent and glitter polish, plus accent stickers like palm trees and tropical flowers. Brush on the transparent base, followed by the glitter on the ends. Affix the stickers and apply a coat or two of a glossy finish. Conclusion We hope these beautiful ocean-inspired nail designs got your creative juices flowing. There are so many different ways to incorporate a nautical theme into your manicure. We wish we could see all the innovative sea-themed ideas you try. While you’re here, get the most from our sales and deals to stock up on nail art supplies today. Moreover, please visit our new arrivals to see what’s trending in the nail world. Remember, we offer complimentary gifts on orders over $35, plus free delivery for shipments over $100!
Learn more
How to Make Your Own Jelly Nail Polish at Home
It’s fun and affordable to do jelly nails at home. If you didn’t know, the jelly nail trend is inspired by the '90s fashion craze of jelly shoes that had a clear, jelly-like texture and came in bright colors. Due to specially formulated polish, jelly nails today have the same translucent, colorful look. But there's no need to spend a lot of money when you might already have everything you need at hand. In this post, we’ll show you how to make your own jelly nail polish at home. We’ll also share tips and tricks to make your jelly nails look amazing. Supplies Needed for DIY Jelly Nail Polish Look through your polish collection. Do you have a clear top coat? And are there a few bright colors, including glitters, that you love to wear? Then all you need is: Clear top coat (either gel polish or nail lacquer). Colored or glitter polish (of the same type as the top coat, either gel or lacquer). A shallow dish, a nail art palette, or another place to combine them. You might also want to use a separate brush to avoid mixing the polishes. However, if you love the jelly color you create, you might want to mix up a whole bottle of it! Method for Making Jelly Nail Polish at Home This simple method allows you to create any color of jelly polish you desire. Here are the steps to follow: Prep your nails by trimming, shaping, and gently pushing back your cuticles. Remember, jelly nails are translucent, so the shape of your natural nails may be visible. If desired, apply a clear base coat to protect your nails and help the polish stick better and last longer. In a small dish, mix double the amount of clear top coat as colored polish. For example, if you use one drop of color, use two drops of top coat. Stir well (but not vigorously to avoid creating bubbles) until the mixture is smooth and even. How does it look? Add more top coat to make it more sheer or more color to deepen the hue. Using your mixture, apply a thin layer of jelly polish on your nails. Let it dry completely (or cure it) before applying another layer. Repeat until you get the desired opacity and finish with another layer of top coat. Remember the cuticle oil! Now, go show off your jelly manicure! Make a Bottle of Jelly Nail Polish You can also make your own custom jelly polish by adding a few drops of color into a clear polish bottle. This way, you can store your jelly polish for later use. Add only one drop at a time and roll the bottle back and forth between your hands until it is well-mixed. Test the color and gradually add more until you’re satisfied. Tips and Tricks for Jelly Nails That Look Stunning Here are ways to make your jelly nails look even more spectacular: Jelly nails look best on long nails. Now is a great time to learn how to do soft gel extensions. This tutorial reveals how to choose the correct sizes, prep the nails, and apply them. Play with different colors and designs to create a unique jelly manicure like ombré nails. Or you can add glitter, stickers, decals, or rhinestones for extra sparkle and fun. You can also combine jelly nails with French tips, negative space, or geometric shapes. The contrast between the clear and opaque parts will make your nails pop! Make your jelly nails more dazzling with encapsulated glitter tips. This tutorial video shows how it’s done with gel polish. Polish Recommendations for Jelly Nails If you need to stock up on polish to do jelly nails at home, here are the ones that we love using: Lavis Gel Diamond Top BUY NOW A single layer of this top coat prevents peeling and chipping for 3 weeks or longer. Moreover, the diamond-like shine brings out the brilliance of your nails. This no-wipe top coat is ideal for blending jelly nail polish at home. You'll just need a nail lamp to cure it. Lavis Gel Polish BUY NOW With over 200 colors available, the hardest part is deciding which one to try first. These gels are easy to apply and won't shrink or bubble when cured. Nail novices adore them, and professionals depend on them. If you want to try out the jelly nails trend but prefer lacquer, consider using LDS polish. This brand is widely regarded as one of the safest options available, thanks to its 9-free formulation that's gentle and healthy for your nails. What's more, it's also great news for animal lovers, as it's cruelty-free and vegan. If you want to achieve a fun and trendy look without compromising your safety or ethics, LDS polish is the perfect choice for you. However, we stock many other nail lacquer brands, including transparent top coats for making jelly polish. Ready to Use Jelly Polish Nevertheless, you don’t have to mix your own jelly nail polish if you know where to find it elsewhere. Both Lavis and LDS have an incredible selection of transparent gels for jelly nails. You can find everything from jelly nudes to neons and sparkly cat eye polish. If you've never used gels before, you'll love them. Unlike lacquer, gel polish won't dry until cured under a nail lamp. Therefore, you have all the time you need to apply it exactly as you want. If you're not satisfied, wipe it off and start over. Plus, you won't have to deal with noxious odors as gel polish is practically odorless. Lastly, a gel manicure stays fresh and new for two or three weeks, unlike lacquer, which starts to chip after only one. It may be time to give gel polish a try! Conclusion We hope you have a great time making jelly nail polish at home! It’s fun to experiment with different colors and designs to create a unique jelly manicure that suits your style and mood. While you're here, please drop by our new arrivals page to see the latest nail trends. Remember, we offer free shipping on all orders over $100!
Learn more
Milk Bath Nails Are the Prettiest Trend You Need for Your Hands
Milk bath nails are the prettiest trend you need for your hands. They've been around for a while but are trending now thanks to celebrities and social media. With its soft, ethereal appearance, this nail trend fits into the "clean girl" aesthetic, making it a must-try for anyone seeking a chic yet dreamy manicure. The look is a delightful blend of elegance and whimsy, drawing inspiration from the luxurious indulgence of a milk bath. As a close cousin to glazed donut nails, milk bath nails boast a creamy base color adorned with intricate floral designs or flecks of glitter, evoking the image of flowers and shimmering particles floating in bath water. Creating milk bath nails requires a keen eye for detail and a delicate touch, as the magic lies in the artful layering of polish to blur the design and produce an illusion of depth. Regardless of the technique, the result is a breathtaking display of artistry that will have everyone asking where you got your manicure! Top Milk Bath Nail Design 2025 Acrylic Milk Bath Nails Milk bath nails can be created using acrylics to encapsulate the flowers and create the illusion of depth. It requires a mix of clear and white acrylic powder and monomer for the milky effect, plus different colors of dried flowers and leaves. The flowers are encapsulated with acrylic that’s then filed so that parts of the leaves and petals show on the surface. It makes them look like they are sinking in the bathwater. Then a final clear coat provides a gorgeous finish that lasts for weeks. Milk Bath Accent Nails Sometimes, a little bit goes a long way. These attractive milk bath accent nails are a perfect accompaniment for the other fingertips. Milk Bath Extensions These elegant coffin tips are the ideal example of milk bath nails. We half-believe that if we touched them, they would feel wet! Faded Milk Bath Nails Have you ever seen something so delicate and beautiful that you can't look away? That's precisely how we feel about these milk bath nails. They remind us of faded Victorian wallpaper with a captivating charm that pulls us in for a closer look. Milk Bath Nails with Glitter These milk bath nails are an indulgent experience, like a spa treatment at your fingertips. They perfectly complement the glitter and confetti of a bath bomb. This manicure is like a fizzy, fragrant soap in the tub! Milk Bath Party Nails Yes, it’s possible to have it all. These bath milk nails include tiny flowers and flecks of glitter with chrome nails on either side. How to Do Milk Bath Nails at Home It's perfectly possible to do milk bath nails at home. You don't even need acrylic powder and monomer to do the look. Instead, it requires off-white nail polish, a base coat, a clear top coat, a makeup sponge, tweezers, dried flowers, nail foil, confetti, or stickers. Break up the flowers into smaller pieces if desired. If you use real flower petals, pre-soak them in water or clear polish to make them flexible enough to sit flat on the nails. Prep your nails by trimming, shaping, and lightly buffing off the shine. Push back cuticles and wipe the nails with rubbing alcohol to remove excess oil. Apply a clear base coat and let it dry. Combine 2 parts of clear top coat with one part of off-white polish. If it looks translucent yet milky, it's ready. If not, alter the ratio. Use a makeup sponge to dab the polish mixture across the nail but not cover the entire nail. You're creating a marbled look. Before that player is completely dry, use tweezers to place the petals onto the nails. Be careful to not smudge the polish. Use the sponge to apply another layer of translucent polish mixture. Again, only cover part of the nail. You're creating an illusion of depth as if the flowers were sinking into bathwater. Once you’re happy with the way it looks, top everything with a clear top coat. An alternative technique is to layer on a sheer but milky nail color as the base. This can be any shade you want, whether pink, mint julep green, or baby blue. Next, create a design with nail stickers, a stamp applicator, or real petals, and then layer the same sheer nail color over it to blur it out. Finish with a glossy top coat. Using gel polish instead of nail lacquer makes it even easier to do milk bath nails. The gel polish won't dry until it's cured in the nail lamp so you have all the time you need to arrange everything perfectly. Moreover, gels have a shiny glass-like finish and last 2 to 3 times as long as a nail lacquer. You can even apply a matte top coat instead for a unique twist on milk bath nails. If you are using gel polish, we recommend starting with this set: Lavis Gel Base BUY NOW The LDS base gel provides the ideal adhesion for a long-lasting manicure. It's designed to be flexible and quick to soak off to protect your natural nails from damage. Lavis Gel Diamond Top BUY NOW Meanwhile, the LDS diamond top gel prevents chipping, scratching, and fading and enhances the vibrancy of your nail art with a high-gloss finish. It saves you time and effort as it’s a no-wipe top coat. Just a single layer makes for a flawless manicure. Conclusion We agree that milk bath nails are the prettiest trend to grace the world of nail art these days. They have such a mesmerizing blend of sophistication, creativity, and enchantment. With their milky base and floating floral designs or glittery accents, these nails evoke a serene, dreamlike quality that is alluring and refreshing, just like a nice long soak in the bath. So, why not treat yourself to this gorgeous trend and experience the beauty of milk bath nails? While you're at it, enjoy the relaxation from saving money with our deals. Remember, we offer free shipping on orders over $100!
Learn more
The 15 Aesthetic Summer Nail Designs To Upgrade Your Nails Art for 2025
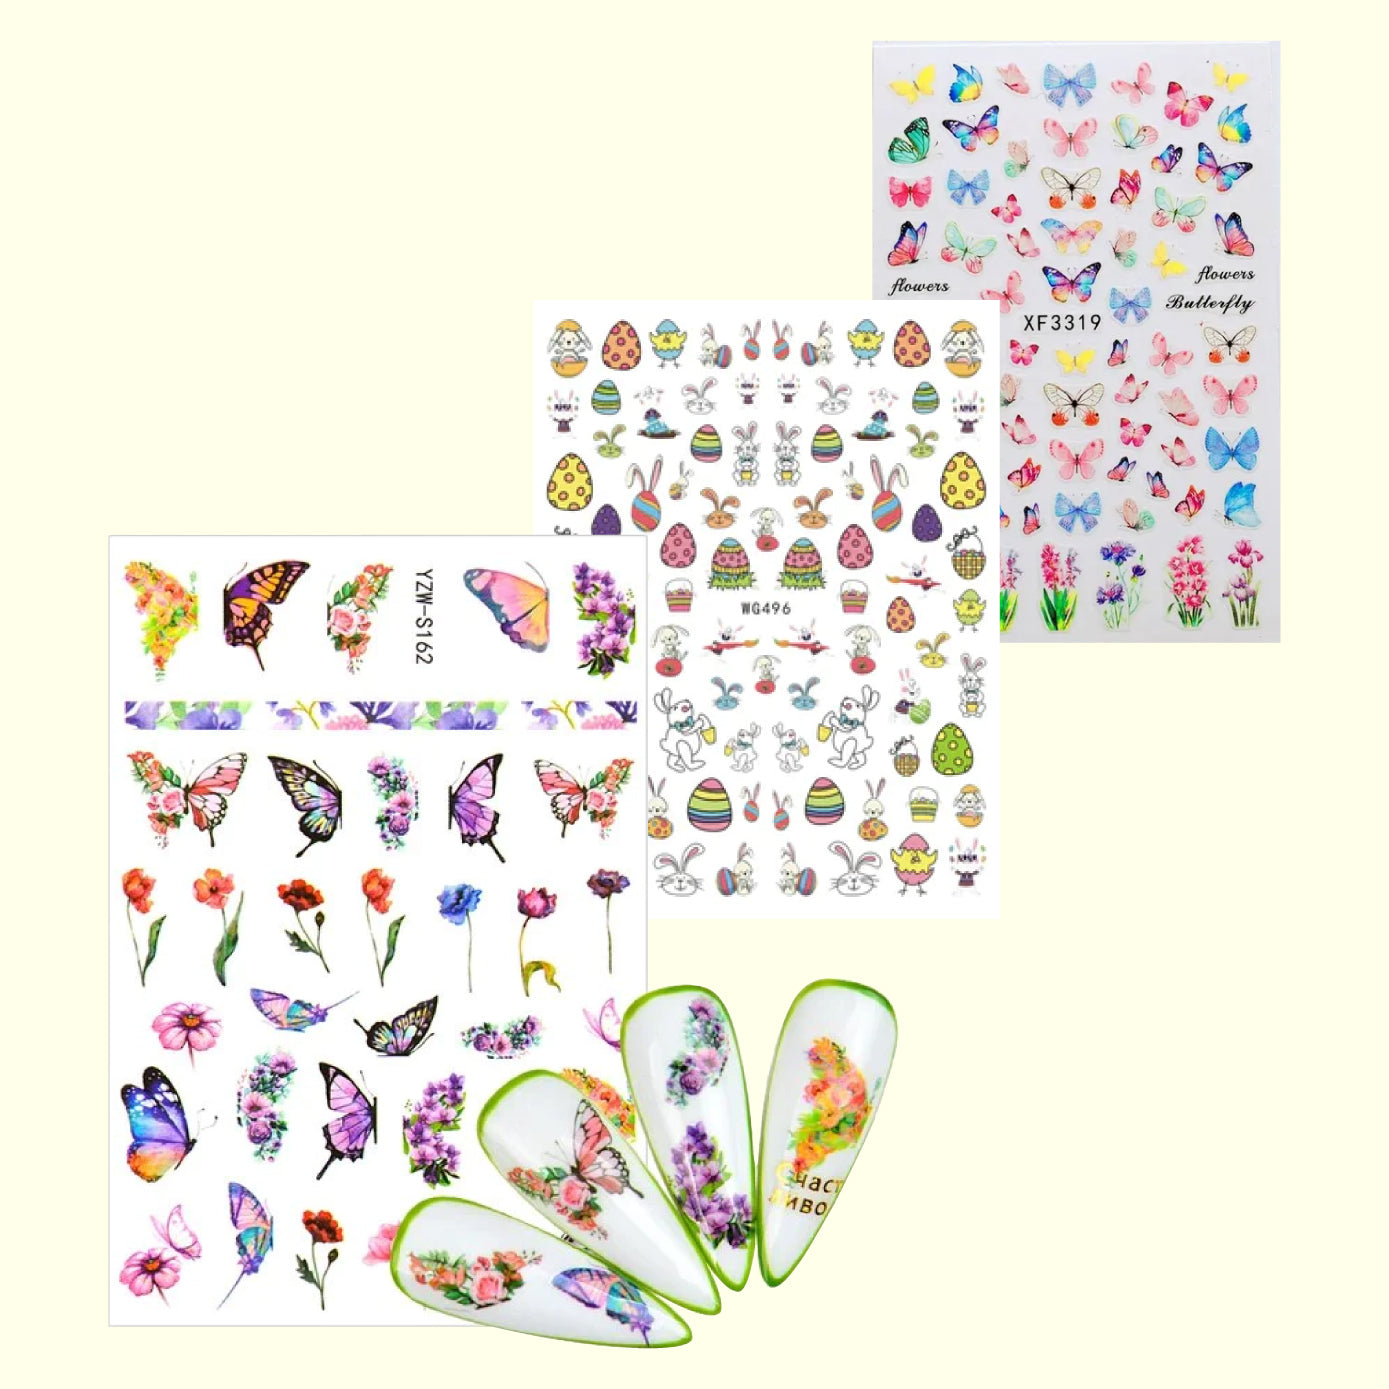
Summer is the perfect time to experiment with your nails and embrace the season's vibrant colors and playful patterns. In this article, we'll introduce you to the best aesthetic summer nail designs that will make you stand out in the sun and feel fabulous all season long. Top 15 Summer Nail Designs for Your Hands Embrace the Fruity Vibes: Nail Designs with Summer Fruit Among all the aesthetic summer manicures to try, here’s one that’s just peachy. Sweet up summer with fruity vibes. Nail designs featuring summer fruits like watermelon slices, juicy strawberries, and zesty citrus will make your nails look deliciously fresh and make your summer style more fun! Not sure how to get started? Check out our nail art sticker collection featuring fruits, flowers, and so much more. They make it easy to add flair to your manicure with minimum effort. If you're a Harry Styles fan, why not try watermelon nails? Neon Nails Light up the night with electrifying neon nails that will make your fingertips glow as you dance the night away. Neon shades of pink, green, and yellow are perfect for creating a striking look that's impossible to ignore. Reflective glow-in-the-dark polish is ideal for summertime fun! Moreover, it’s super easy to do abstract neon nails with micro dots, swirls, and geometric patterns. All you need are neon line art gels with an extra thin brush in the bottle. Combine them with chrome powder or liquid chrome and enjoy even more stunning effects! Floral-inspired Designs: Summer Blooms Floral-inspired designs are always a popular choice for summer, whether you enjoy delicate blooms or vivid colors. From intricate roses to simple daisies, summer blooms will lend your nails a touch of elegance and romance. If you prefer 3D nails for extra wow, visit our dried flower nail art collection. Flaming Hot Nails If you’re feeling daring, flames will ignite your summer look. Turn up the heat with flaming hot nails with fiery shades of red, orange, and yellow. These bold and daring designs match the season's rising temperatures and really make a statement! Get Groovy: Tie Dye Nails Get groovy with tie-dye nails that bring back memories of the '60s and '70s. This colorful and psychedelic design is perfect for those looking to add Bohemian flair to their summer look. Plus, it’s a snap to get this look with blooming gel. LDS Blossom Gel Polish BUY NOW Brush a coat of blossom gel onto the base coat but don't cure it yet. Instead, let a drop of colored polish fall on it. Watch mesmerized as the shade slowly spreads and blooms across the nail. Cure it when you're satisfied, or add other colors for a custom blend. Patriotic Flair: Stars and Stripes Showing off your patriotic spirit with stars and striped nail designs is effortless. They’re perfect for celebrating the Fourth of July, but you can start early with Flag Day in June! Celebrate Love: Pride Nails Celebrate love with Pride Month nails that showcase the beautiful colors of the rainbow and the infinite diversity of humanity. It’s a great way to show your support for the LGBTQ+ community and the message of love and acceptance. Cool and Refreshing: Mint Julep Nails Stay cool and refreshed with mint julep nails featuring cool shades of bluish-green that remind you of a relaxing day by the pool. Trendy and Translucent: Jelly Nails Jelly nails are one of the top nail trends for summer with their translucent look and bright colors. They're perfect for showing off a fresh tan and will make your nails stand out from the crowd. Spice them up with glitter or encapsulated stickers for extra excitement. Dreamy Skies: Cloud Nails For a dreamy summer look, try cloud nails with soft pastel shades and fluffy whiteness that will have you daydreaming of warm breezes and carefree days ahead. Vintage Charm: Retro Colors Vintage charm takes center stage with retro nail designs featuring classic shades of red, pink, green, and coral. Bonus points for the hippie daisies! Creamsicle Nails Indulge your sweet tooth with creamsicle nails that evoke memories of those delicious summertime treats. Flutter Away: Butterflies Embrace your inner free spirit and flutter away with butterfly nail designs with delicate wing patterns and a touch of whimsy. The look is simple to create with summery stickers and a transparent top coat. Dive into the Deep: Ocean Nails Dive into the deep with oceanic nails that showcase the beauty of the sea through shades of blue, green, and shimmering accents. These designs are perfect for a beach day or a pool party. Beach Nails Life's a beach with beach nail designs that capture the essence of the sun, sand, and surf. From tropical palm trees to tiny seashells, these nail art designs will transport you to your own personal paradise. Visit our nail charms collection to get started. Upgrade Your Summer with New Nail Tools Complete your summer manicure faster with a professional nail lamp. It saves time and reduces your UV exposure, so you can spend more time catching rays outdoors. Play it even safer by wearing UV-protective gloves or applying sunscreen fifteen minutes before starting your manicure. Lavis UV/LED Nail Lamp BUY NOW The LAVIS nail lamp is a game-changer for salons and home users. You won't believe the difference it makes compared to your old nail lamp. First, it's rechargeable, so you won't be stuck near a power outlet to do your nails anymore. Second, the motion sensor and timer settings make it super convenient. And let's talk about the mirror finish interior and strategically placed LEDs- they provide a perfect cure every single time. Tips for Maintaining Your Summer Nails Do you want to know the one thing that will make your manicure look better and last longer? Truth – it keeps your skin and nails healthy and looking their best while bringing out the colors of your polish. 24K Gold Nail & Cuticle Oil BUY NOW Cuticle oil is what the professionals use to give your nails that extra sparkle at the end of a manicure. This one is infused with 24-karat gold and essential oils to provide you with serious shine and nourishment. Plus, it's got hyaluronic acid - one of the best moisturizers out there! All you have to do is decide which scent to start with. Conclusion Which summer nail designs will you try? There are plenty of fantastic summer nail designs to choose from, each with its own unique aesthetic appeal. Whether you're looking for something playful and fun, sweet and cute, or nails that are daring and bold, there's a summer nail design out there that's perfect for you. Stop by our deals page to start stocking up on everything you need.
Learn more
The 10 Best Brown Chrome Nails 2025
The best brown chrome nails are like chocolate-glazed donut nails with a metallic gleam. They are cozy yet sophisticated for fall and winter. Moreover, many options exist, from a creamy cappuccino to deep dark chocolate shades. There's a brown chrome manicure to suit everyone regardless of skin tone. Also, brown chrome nails aren't limited to a single style. They come in all sorts of designs, both subtle and dazzling. If you're looking for a manicure to make you stand out, this is the one to try next. Just take a look at these gorgeous brown chrome nail designs. Top Brown Chrome Nails Chrome and Chocolate Glazed Donut Nails Take Hailey Bieber’s chocolate glazed donut nails and burnish them with chrome. That’s how you get this beautiful rendition of brown chrome nails. Instead of using a pearlescent finish, use a chrome powder instead. Go as dark or as light as you like. The Lavis Bourbon shade suits us perfectly. Dripping with Chocolate This look makes us want to lick our fingers! Start with a dark chocolate shade and glam it up with the right sheen of chrome powder to look like glazed donut nails. Then create the drips with line art gel polish. Easy! Chocolate-dipped Chrome Nails Instead of making brown chrome the primary color of your nails, use it only as an accent. It looks like you dipped your fingers in metallic chocolate syrup! It's subtle on a nude base, but just imagine the effect on milky-white nails. It would be like a French manicure dessert! Ombré Brown and Chrome Nails If you’ve never done ombré nails, here is an excellent tutorial. Swap the pink polish in the video for brown shades; you're halfway there. You should also see a second brief video about doing chrome ombré nails. Gold Accents There are many ways to add gold accents to brown chrome nails. For example, half the nail could be brown and the other half golden chrome. You also have options like gold glitter polish, gold foil, and gold nail charms and jewelry. Chrome and Cream Almond Nails This simple design features elegant almond-shaped nails, a trendy style that flatters everyone’s hands. Checkered, Striped, or Tweed How do you get perfectly straight lines on your nails? You can freehand them or use nail tape or a stencil. Why not try nail stickers, too? On the other hand, if you want your brown chrome nails to look like tweed, use a fluffy brush to create a mixed texture. Then strategically apply chrome powder. Swirls Do you know what the secret to doing swirly brown chrome nails is? It’s blossom gel polish, also known as blooming gel. After you apply a clear base coat, brush on the blooming gel and don't cure it yet. Instead, dab on the brown color gel and let it bloom across the nail. When you're satisfied with how it looks, cure it with a nail lamp. Remember the top coat! Another fun variation is to use rose gold embossing gel for touchable texture and visual delight. Brown Chrome with Jeweled Accent Nails Brown chrome nails have a magical sheen similar to mother-of-pearl nails. That's why they are a match made in heaven for your manicure. There are infinite ways to combine these designs. One can serve as an accent for the other on the same nail or alternating nails. Holographic Brown Chrome Can you combine holographic with chrome on brown nails? After all, a holographic finish has a rainbow color effect, while chrome is monochromatic with a mirror finish. On the surface, they seem so different until you see a nail design that blends both worlds. How to Do Brown Chrome Nails Let's be honest; you'll get better results with gel polish and have more artistic control over brown chrome nail designs. However, it’s also possible to use lacquer. Just be sure to finish it with a super glossy top coat. If you want to do opaque and chocolatey brown chrome nails with gels, plan on two coats of color. Then add one layer of top coat before rubbing in the chrome powder. In each case, thin layers are better than thick ones. It takes a bit of rubbing to get the perfect glassy, metallic sheen from the chrome powder. You are literally polishing the nail with the powder as if shining up the bumper on a vintage car. That's why it's called "burnishing." If you're happy with how it looks after the first treatment, stop and brush on a top coat and cure. Otherwise, apply another layer of top coat and rub in the chrome powder again. How to Do Brown Chrome Nails with Makeup No, this isn’t fake news. If you don’t have a nice selection of chrome powders like the set below, you can use makeup to create a look. Chrome Powder Set 6 Colors What do gold, bronze, silver, rose, gold, and scarlet have in common? They are chrome powders for your nails. It used to be that only professionals had access to them. These finely textured particles of colored pigment, metal, and glass create a mirror finish on your manicure. So, while you wait for the chrome powder to arrive, it's time to dig in your makeup bag. Do you have pearlescent eye shadow? How about an iridescent highlighter? You can use either to imitate chrome powder on top of brown nail lacquer. Ensure the nail color is dry and won't smudge when you start rubbing in the powder. And be sure to seal the finish with a glossy top coat. Conclusion It’s time to power up your manicure with brown chrome nails. The metallic sheen dresses up a cozy manicure into a sophisticated head-turner. What’s more, there are so many different brown chrome nail designs, colors, and styles to try! If you want to see what else is trending, check out our new arrivals. Now’s the best time to stock up because we offer free shipping on orders over $100!
Learn more