FREE SHIPPING WITH ORDERS OF $100+
- HOME
- NEW IN
-
SHOP
- Back
- SHOP
- 🌟 SPECIAL GEL
- 🌟 GEL & LACQUER
- 🌟 GEL COLOR
- 🌟 NAIL LACQUER
-
🌟 ACRYLIC & DIPPING POWDER
- Back
- 🌟 ACRYLIC & DIPPING POWDER
- * BUILD YOUR OWN
- * ACRYLIC LIQUID MONOMER EMA
- * LAVIS 1oz
- * LAVIS 1.5oz
- * LAVIS ACRYLIC GLITTER
- * DND
- * DND DC
- * SNS BASICS
- * KIARA SKY All-In-One
- * GELIXIR
- * CHISEL
- * CND
- * CHAUN LEGEND
- * MIA SECRET
- * YOUNG NAIL
- * V BEAUTY PURE
- * TONY LY
- * ACRYLIC BRUSH
- * ACRYLIC ACCESSORIES
- 🌟 DIPPING POWDER
- 🌟 3 IN 1
- 🌟 SOFT GEL & NAIL TIPS
- 🌟 TOOLS & ACCESSORIES
-
🌟 PINK & WHITE
- Back
- 🌟 PINK & WHITE
- * LDS Pink & White, Clear Powder
- * Lavis Clear & Cover Colors
- * OPI Pink & White Dipping Powder Colors
- * Nugenesis Pink & White Acrylic & Dipping Powder Colors
- * Kiara Sky All-in-one Pink & White Acrylic & Dipping Powder
- * Chisel Pink & White Acrylic & Dipping Powder Colors
- * V Beauty Pure Acrylic Clear & Cover Colors
- * SNS Pink & White Dipping Powder Colors
- 🌟 HARD GEL
- 🌟 GEL & NAIL POLISH REMOVER
- 🌟 WAX PRODUCT & ACCESSORIES
- 🌟 PRESS ON NAILS
- BUY IN BULK & SAVE
- CLEARANCE
- BRANDS
- NAIL ART
- NAIL CARE
- HOME
- NEW IN
-
SHOP
- 🌟 SPECIAL GEL
- 🌟 GEL & LACQUER
- 🌟 GEL COLOR
- 🌟 NAIL LACQUER
- 🌟 ACRYLIC & DIPPING POWDER
- 🌟 DIPPING POWDER
- 🌟 3 IN 1
- 🌟 SOFT GEL & NAIL TIPS
- 🌟 TOOLS & ACCESSORIES
-
🌟 PINK & WHITE
- * LDS Pink & White, Clear Powder
- * Lavis Clear & Cover Colors
- * OPI Pink & White Dipping Powder Colors
- * Nugenesis Pink & White Acrylic & Dipping Powder Colors
- * Kiara Sky All-in-one Pink & White Acrylic & Dipping Powder
- * Chisel Pink & White Acrylic & Dipping Powder Colors
- * V Beauty Pure Acrylic Clear & Cover Colors
- * SNS Pink & White Dipping Powder Colors
- 🌟 HARD GEL
- 🌟 GEL & NAIL POLISH REMOVER
- 🌟 WAX PRODUCT & ACCESSORIES
- 🌟 PRESS ON NAILS
- BUY IN BULK & SAVE
- CLEARANCE
- BRANDS
- NAIL ART
- NAIL CARE

Top Professional Rubber Base Gel for Strong Manicures
·
Written by Tran Khue
When you want to strengthen fragile nails and extend the lifetime of a manicure, you need rubber base gel. There’s nothing else like it...

What Are Builder Gel Nails? Things You Need to Know
·
Written by Tran Khue
What are builder gel nails? They are a versatile choice for anyone seeking a durable manicure that strengthens nails...

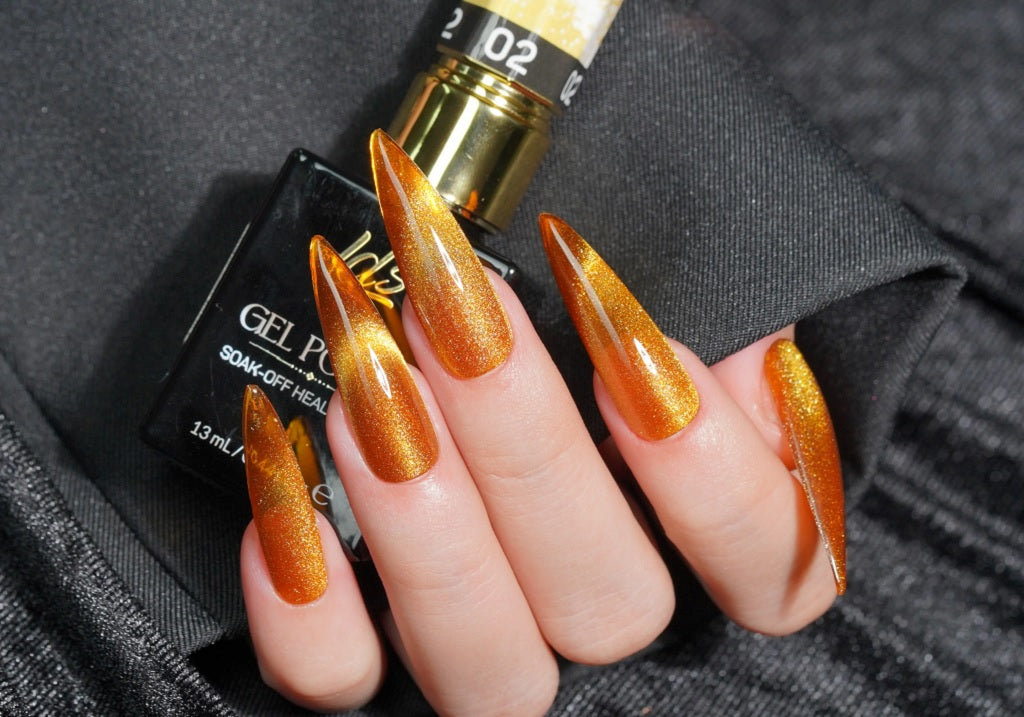
Rock the Holiday Look with Cat Eye Gel Nails
·
Written by Tran Khue
Want to add a little something special to your outfit for the holidays? Why not make things magical with a little sparkle on your fingertips?...

Introducing Cashmere-inspired Nail Design: The Pinnacle of Nail Luxury
·
Written by Tran Khue
Do you remember how luxurious cashmere feels? Now, imagine that same extravagance for your fingertips...
Popular Nail Art Designs with Ripple Cat Eye Gel Polish
·
Written by Tran Khue
Magnetic polish has just been upgraded! You’ve got to try popular nail art designs with our new Ripple Cat Eye polish...

DIY Press-On Nails with Soft Gel Tips: Simple and Affordable Way for Beauty Enthusiasts to Create Stunning Nail Styles
·
Written by Tran Khue
We sometimes find ourselves in a dilemma when it comes to press-on nails. On the one hand, they’r...

10 Mauve Nail Ideas and Polishes to Try in 2025
·
Written by Tran Khue
Mauve is a sophisticated color. For many, it's a fashion favorite that blends pink and violet to perfection. You can wear this charming shade any time of year, making it an ideal choice for your next manicure. Let's discover ten mauve nail ideas and polishes to try in 2025...
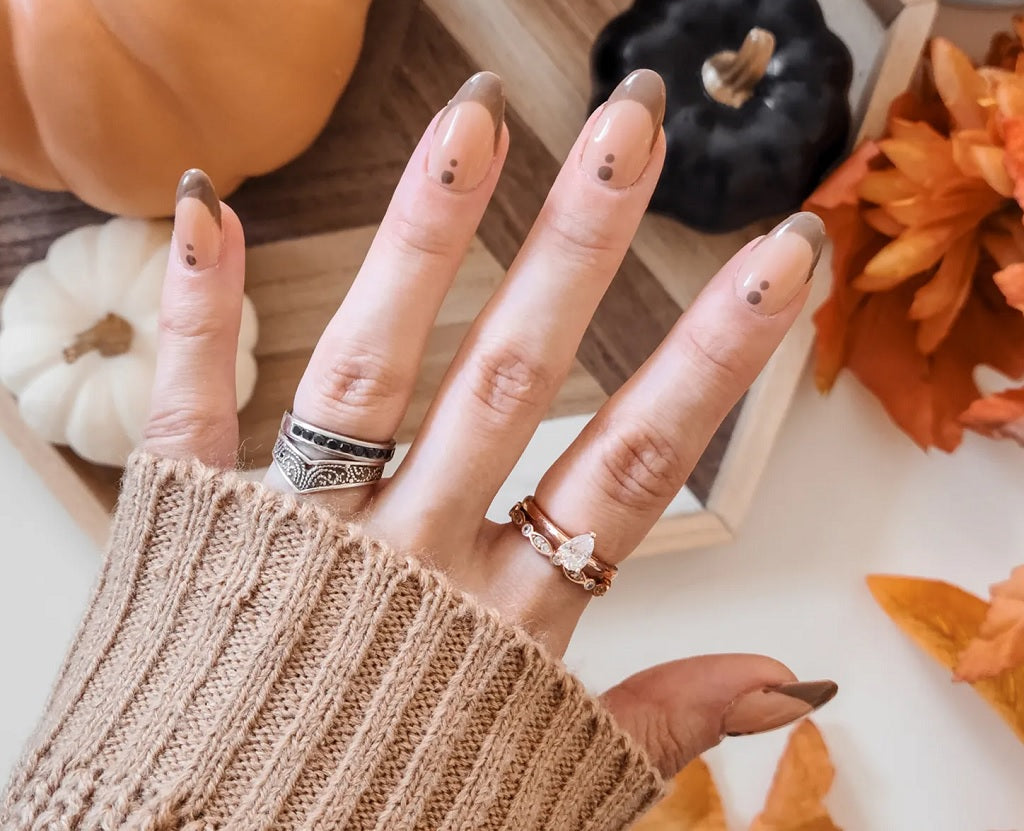
The 10 Best Fall Nail Polish Colors to Wear in 2025
·
Written by Tran Khue
It's time to downshift from neon summer shades to autumn colors. As leaves transform from brilliant green to warm hues, so we adapt our manicures to the changing seasons. Right now, the best fall nail polish colors to wear in 2025 are calm, cozy, and elegant. Explore them below.

The 8 Best Nail Polish Removers That Won’t Damage Your Nails 2025
·
Written by Tran Khue
When it comes to maintaining the health and beauty of your nails, choosing a safe nail polish rem...

Lavis Jelly Nude Gel Nails Review 2025
·
Written by Tran Khue
Do you love the clean look aesthetic? Like when your nails have a sheer wash of shiny color and n...

The 5 Best Non-toxic Nail Polishes 2025
·
Written by Tran Khue
If you want non-toxic nail polish for pregnancy or just want to take care of your health, it can ...