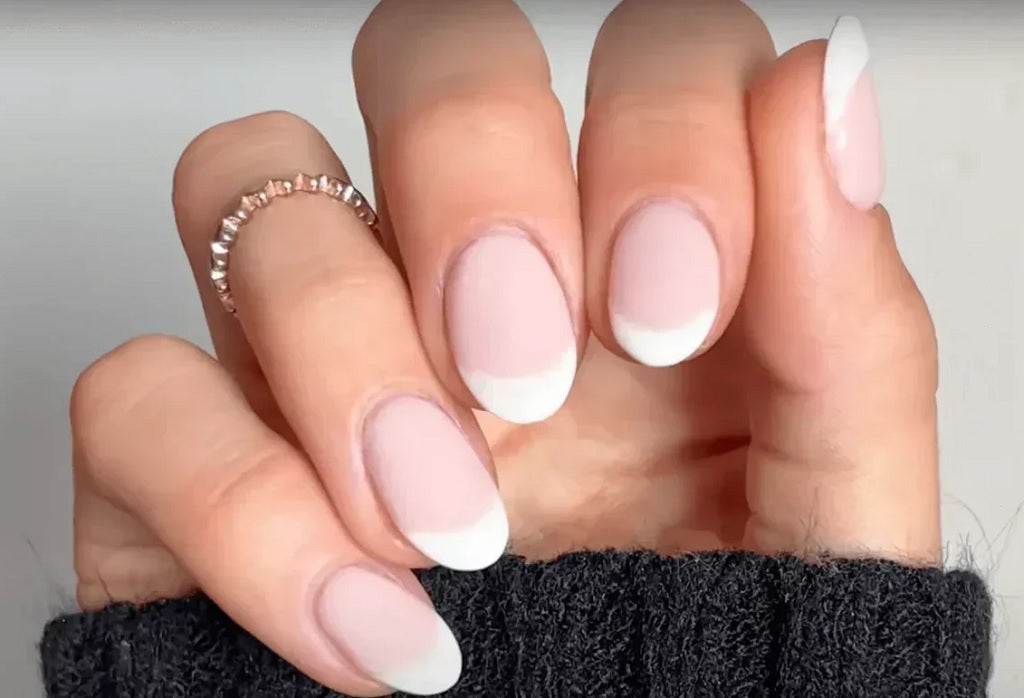
French tips with dip powder sound intimidating. But once you know a few tricks, they’re surprisingly doable. Dip powder provides a natural-looking finish that holds up beautifully, so it’s a smart choice for someone who wants their nails to last longer than gels or lacquer.
Want a classic white tip? Easy. Curious about bold colors or reverse French? Also, straighforward. Here are three reliable ways to get French tips with dip powder, and how to fix hiccups along the way.
Dip Nails with French Tips

One of the biggest challenges of creating French tips with dip powder is achieving a perfect smile line. The next difficulty is avoiding too much thickness at the free edge. These two issues intimidate many who would love to create dip powder French manicures. So, before we go any further, you should know that we’re going to break down these walls so that you can succeed!
LDS Pink & White Kit 5: Clear, Base, French White, Natural Pink, Dark Pink, 1 French Dip Molding

3 Ways to Achieve Beautiful French Tips with Dip Powder
Dip or sprinkle – those are the main methods for applying dip powder. When it comes to dipping nails, you might use a French tip mold for more precise results than a jar. But you may feel like it’s easier to use stickers or nail tape to mask off the tip for a flawless smile line. So, if you get frustrated with uneven results, try tape or stickers, especially when sprinkling the powder.
Now, to be honest, we have to play devil’s advocate and warn you that even tape has a downside. The simple act of removing it might mess up your hard work. Let’s go through the steps for creating French tips with the powder and troubleshoot potential problems.

SNS Pro Dipping & Acrylic Powder - 005 CS-09 LAVENDER KISSES

Dip Nails in a Mold
This is how dip powder nails got their name: the act of dipping the nail into the powder. Somewhere, a genius contemplated acrylic nails and decided to make a change that made life easier for a whole generation of nail techs while providing safer manicures to clients.
Dip nails provide durability on a par with acrylic without as much odor during application and with a safer removal process. Moreover, there’s no need for a nail lamp as everything air dries.
Preparation
Before creating French tips with dip powder, let’s set up the work area. This can be a somewhat messy manicure, so cover the work area with a paper towel or similar. Next, prevent cross-contamination by pouring the powders into separate molds instead of everyone dipping their fingers into the same containers.
You’ll need at least two colors for the French tips, like the traditional white and pink, plus clear powder if you want an extra glossy finish. Finally, it’s essential to have all the liquids like primer/dehydrator, base coat, dry sealer/activator, top coat, and brush saver/cleaner.
The Process
After nail prep, apply the primer, which typically dries by the time you finish all ten fingers. Then focus on a single finger at a time for the best results.
First, brush on the base coat and while it’s wet, dip the nail into the white powder as deep as you’d like the smile line to look. Tap off the excess, then dip the nail into the nude base color. Don’t worry, this shade won’t stick where the white powder already is.
Again, tap off the excess powder. Brush on another thin layer of the base coat and repeat dipping first the white tips, then the finger deeper into the nude color. (Be sure to clean the brush before putting it back in the bottle or you will cross contaminate the liquid).
When you plunge the nails into the powder, lower them at a 45° angle, and pull them out the same way. If you want a micro French tip, do just the white part straight down at 90°. Keep the nails in the powder for a couple of seconds before pulling them out. The powder will only stick where the base coat was applied.
After two or three repetitions, if you’re happy with the way things look, brush on a coat of activator/dry sealer and let it dry. Finish with the top coat.
For an extra shiny, durable finish, dip the nails into clear powder before applying the dry sealer/activator, then wrap up with the top coat all the same.
In summary, prep the nails, apply the primer, then the base coat, dip the tips, dip the rest of the nail, apply more base coat, dip the entire nail into clear powder for extra shine, apply the activator, finish with a top coat. Repeat the base coat and powder steps two or three times for perfect coverage.

OPI Dipping Powder Nail - E41 Barefoot in Barcelona

Dip Nails in a Jar
Let’s imagine that you’re just doing your own French tip dip nails at home. Do you really need to use a mold? Although it prevents clumps in the powder, we won’t tell anyone if you just dip your nails in a jar. You washed your hands first, right?
The process is the same as described above. After applying the primer and base coat, while the base is wet, slide the finger into the powder at a shallow angle. If you rock it slightly from side to side, it will push the white powder up the edges. Keep the same angle consistent when you push the finger into the powder and pull it out.
If your French tips are turning out fuzzy, make the most of it. Blur the lines with Boomer nails!

LDS Dipping Powder Nail - 051 Pinky Pink - 1oz

LDS Dipping Powder Nail - 002 Oatmeal - 1oz

Sprinkling French Tips with Dip Powder
Instead of dipping the nails, some prefer to sprinkle the powder over the top. This is a sanitary way to go about it, but may waste powder, and it doesn’t always make for perfect French tips unless you pair it with nail tape or stickers to mask off the smile line.
Prep the nails with primer, affix the nail tape, carefully brush on the base coat where you want the smile line, then while it’s wet sprinkle the nails with powder. Tap off the extra powder, re-apply the base, and sprinkle again.
Remove the nail tape gently and then carefully paint the rest of the nail with base and sprinkle it with pink or nude powder. Finish the steps as described above.
Again, if you’re struggling to get that ideal smile line, you have options! Check out this reverse French with an ombre fade. Turn those lemons into lemonade!

NuGenesis Natural Base - Pink & White 1.5 oz

Troubleshooting French Tips with Dip Powder
If dip nails dry cloudy, the powder may be old. If the finish looks dull, you might’ve accidentally touched the nails and transferred finger oil. It’s also possible to contaminate the top coat with powder. Brush saver liquid and lint-free wipes are essential!
If it’s clumpy, the powder may have been exposed to extreme temperatures or humidity or contaminated with the base coat or activator.
Also, some dip powders like glitters need to be shaken before use.
If the nails are bumpy, buff the surface and use a lint-free wipe to cleanse them before applying the top coat.
Feel free to repeat the top coat up to four times for extra gloss because it’s thinner than gel top. Otherwise, just use a gel top coat and cure it in a lamp – most brands are compatible.
Finally, if you’re concerned about throwing away money on dip powder when you may give up on dip nails, we carry combination dip and acrylic powder, so nothing goes to waste.
Conclusion
May every French tip dip manicure turn out as beautiful as you hoped! Shop our store for dip essentials and gorgeous colors from top brands.