Cat nails are cute, fun, and easier than you think. If you've been eyeing sculpted ears and paws and figured they'd take forever, we've got news. The right tools make all the difference! Today we’re looking at adorable nail cat design ideas that look impressive yet won't take all afternoon.
Nail Cat Design Ideas
Hello Kitty!

Let’s begin with the most kawaii of all cats, Hello Kitty. She’s irresistible and so easy to sculpt. No need to turn to acrylic for this 3D nail art. Instead, you’ll need the typical tools for a gel manicure like a nail lamp, base coat, and top coat.
Next, if you use LAVIS Non-Sticky Builder Gel, you’ll find that it’s much easier to work with than the average builder gel. The fact that it doesn’t stick to your brush or tool makes it so easy to mold!
Begin by rolling a little gel into a strip and slicing it into equal sized bits to form the ears. Place one bit near the nail edge, but not on it. Leave a little space because Hello Kitty’s round face curves out beyond her ears. Place the other bit of hard gel near the cuticle, but again not on it so that the curve of the cuticle becomes the edge of her face. Then use a brush handle or a sculpting tool to press the ears into a triangular shape. Cure that layer. Already you can see the adorable nail cat design forming!
Now, apply a milky, sheer shade over the entire nail and ears and glaze it with chrome powder. This creates a beautiful iridescent base for the translucent glitter polish that sparkles across her face.
Use a precision brush or LDS Line Art Gel (that has a fine brush in the bottle) to draw Hello Kitty’s eyes, whiskers, and nose. Add a touch of blush with pink glitter polish.
But what about the bow? Use the same pink glitter polish in a nail charm mold to form the bow and cure it. Attach it just in front of her ear, then finish with a glossy top coat.
If you want Hello Kitty nails that are even easier, check out the 3D cat nail charm mold in our shop.
3D Nail Charm Mold 14 - Cat

LDS Color Craze Gel Nail Polish - 967 Barbie Dreamhouse - Glitter Gel - 0.5oz

LDS Color Craze Gel Nail Polish - 965 Day Dream - Glitter Gel - 0.5oz

Curious Kitties

It’s not always necessary to sculpt if you want adorable cat nails. Instead, this artist applied soft gel tips, painted them in a sheer shade, and added curious little kitties and curvy tails. If you can draw circles and triangles, you can draw cats for nail art!
If it’s challenging to do cat nail designs on your own hands because of the angle, the soft gel tips can be turned into press-on nails. Paint them ahead of time, then attach them with nail glue.
Yet another option is to shop for cat nail stickers. If you want to do a unique-looking set like this, trim the kitties so that you can place heads and tails and paws in random places.
Apres Soft Gel

3D Cat Nails

We’ve seen sculpted kitty cat nails that look like they are embracing fingertips. Sometimes the artist adds all four legs, sometimes only two with a tail. It’s tricky because an ultra-realistic design might be too fragile or bulky or likely to snag. Here the artist has found a balance between the tails sculptured mid-twitch that look absolutely touchable and a sleek, flat face that won’t catch on clothes.
If you love working with acrylic for sculpting nail art, you’ve got to see the impressive selection of brands and colors we carry!
Smoky Black Cats

How about a fierce cat nail design? This one would be excellent for Halloween or anyone channeling their inner sorceress! Although the black kitty looks quite ferocious, we have to admit that the cat butt made us laugh!
So, how did the artist achieve the smoky look? She might have used blooming gel or a product like the new LAVIS Wave Gel that’s ideal for fluid nail art.
How does it work? After you apply and cure the base color, brush on a thin layer of top coat but don’t cure it. Then place a drop or draw a pattern with Wave Gel and the pigment will begin to spread out or bloom by itself. As soon as you’re pleased with how it looks, cure the nail. It’s best to work on one fingertip at a time.
LAVIS Blooming Gel

LAVIS Wave Gel 02 - 0.5 oz

Touchable Paw Prints

Cat owners know just how hard it is to resist squeezing those little beans on the bottom of kitty paws. Now you can re-create the same delightful temptation for a manicure. All it takes is a little builder gel in the jar and the patience to mold footpads from it. Since LAVIS non-sticky builder gel in the jar comes in various colors, you can use it as it is, then simply seal it with a top coat. It might even look more realistically velvety with a matte finish!
LAVIS Builder Gel Jar Non Sticky - 00 Clear 15g

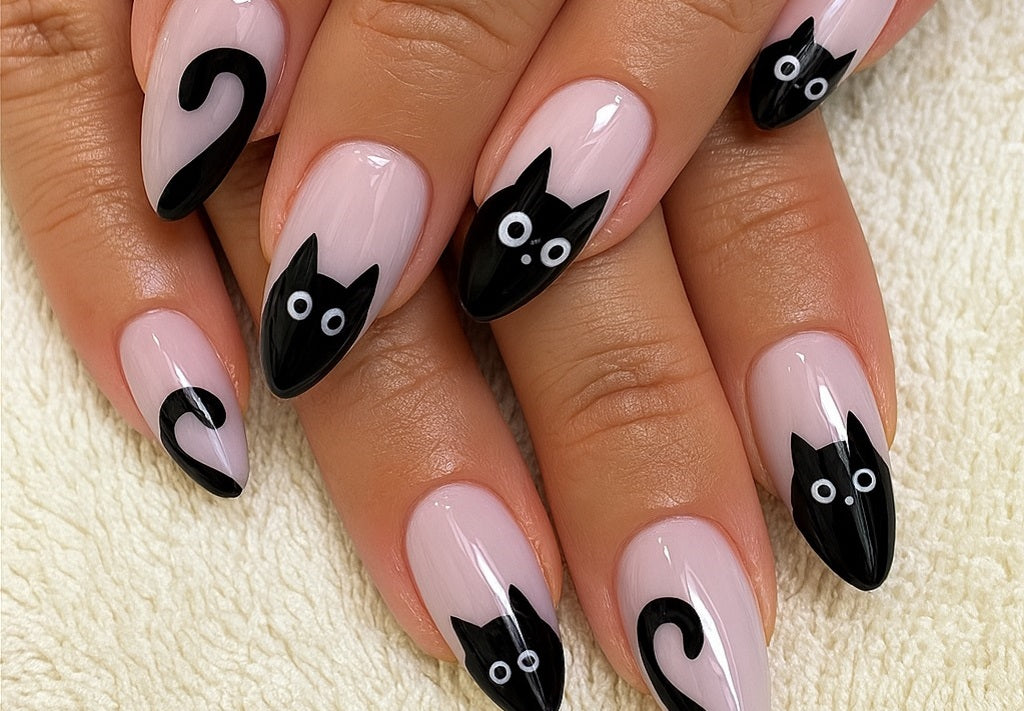
Simple Cat Faces

Give the old French manicure a meow-gical upgrade with cat faces on your fingertips. If you can draw lines, triangles, and circles, you can definitely draw kitten faces. Or you could use nail stickers to speed things up and we won’t tell anyone. For bonus points, use cat eye gel for the base color!
Conclusion
Now that you’ve seen these adorable nail cat design ideas, which one will you try first? Will you customize it to make it seasonal or to suit your personality or ensemble? Although we didn’t dig into details like those, we’re certain your meow-velous creativity is already sparking!
Shop our store for professional nail art supplies to help you reach all your nail goals without breaking the budget. Did you know we offer free shipping on orders over $100? Join the Glam Squad to get even deeper discounts plus expert tips, tutorials, and behind-the-scenes looks at the latest trends in nail art.