Did you know a crimped acrylic brush lets you work closer to the cuticle without flooding it? It also gives you a broader bead, so you can use a small brush and still work fast. If you'd like to know how to crimp an acrylic nail brush, read on.
Types of Acrylic Nail Brushes

The best acrylic brushes are made with Kolinsky sable fur. These natural bristles are perfect for working with acrylics. Moreover, they are straightforward to maintain. To clean them, all you need to do is soak them in liquid monomer.
Acrylic nail brushes come in three types depending on the shape of the bristles.
Round brushes are the most common shape. It’s what you usually find in acrylic kits for beginners. The round brush bristles come to a point, making this style perfect for precise nail art.
Next, there are oval-shaped acrylic brushes frequently used by professionals. They are helpful for nail art and long strokes for overlays and extensions.
Lastly, flat acrylic brushes are uncommon but convenient for one-bead acrylic nails.
Therefore, a nail artist may crimp or pinch an acrylic brush to change a round brush into an oval or flat shape.
What Is Crimping?
When you crimp an acrylic brush, you're changing the shape of the ferrule. It's more permanent than temporarily pinching the bristles into a different form.
The end goal of crimping is to make the bristles lay flatter. Of course, this is a lasting change to the brush, so it's crucial to do it correctly.
What Do You Need to Crimp an Acrylic Nail Brush?
To get the best results, you’ll need an acrylic brush with a metal ferrule like this:
Lavis Kolinsky Acrylic Brush #16

This is a professional-grade acrylic nail brush with a wooden handle, metal ferrule, and soft bristles. With proper care, it can last for years of service.
It would be best to have liquid monomer to help you decide where to crimp the ferrule. Use a lint-free white or a paper towel to blot the brush. It’s also smart to avoid getting monomer on your skin, so a pair of rubber gloves may help.
And the last thing you must have is a pair of needlenose pliers. Please avoid cutting pliers or slip-joint pliers.
How to Crimp an Acrylic Nail Brush?
It’s a good idea to practice on an old brush. If you use a new acrylic brush, remove all the resin from it first.
Begin by dampening the bristles with liquid monomer. Press out the excess liquid. Then use your fingers (while wearing gloves) or a paper towel to press the bristles into the shape you want to achieve by crimping the ferrule. Pay close attention to the tips. You want the bristles to look smooth and natural, not like saw teeth.
Place the ferrule in the jaws of the pliers. Position the pliers about 2mm from the edge where the bristles emerge. (This is about the thickness of a toothpick or a dollar coin.) This is so that you don't crimp the hairs but the metal instead.
Grip the handle of the pliers and gently squeeze. Don’t try to pinch too much at first. You can always do more crimping later.
Check your work by pressing on the damp bristles. Do they form the shape that you wanted? If not, you can repeat the crimping and flatten the ferrule more.
Once you’re pleased with the result, let the acrylic brush dry flat before storing it.
When Should You Not Crimp an Acrylic Nail Brush?
If you use the brush for nail art, you may not want to pinch it. A flatter brush is convenient for doing large strokes but not useful for tiny designs. Meanwhile, the bristles on a round brush come to a point, and that's ideal for making acrylic flowers and more.
Can You Un-crimp a Nail Brush?
What happens if you've squeezed too hard and don't like the shape of the bristles? Can you pinch the brush in the other direction and make the ferrule round again?
It’s unlikely that you’ll succeed. In fact, you may cause the bristles to fall out or find the tips set in a permanently jagged shape.
To avoid disappointment, squeeze gently and gradually crimp the ferrule. If all fails, check our sales on nail art brushes to find a replacement.
What Size of Acrylic Nail Brush Is the Best?
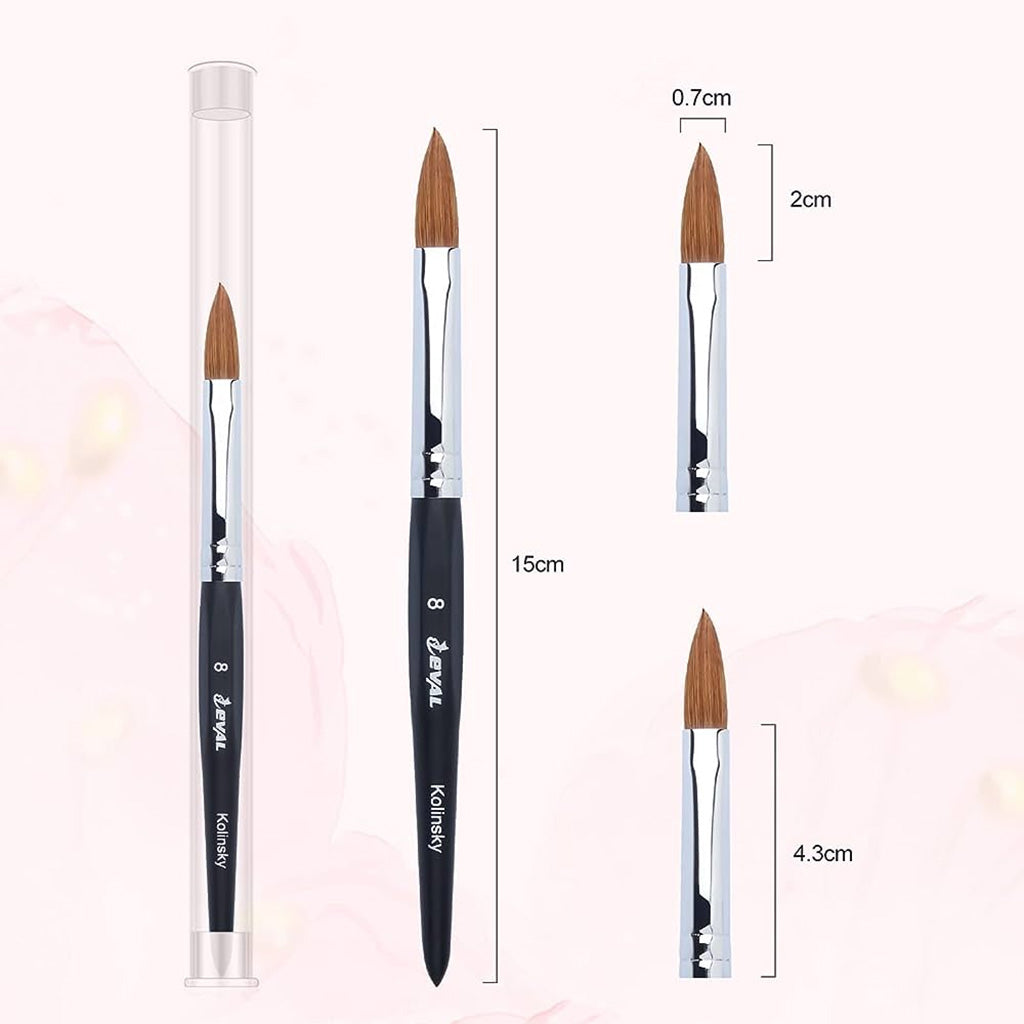
If you're new to doing acrylics, most beginners start with a size 8. This small brush is easy to control when you're learning to do beads. Professionals, meanwhile, commonly use sizes 16 to 20.
This brief video demonstrates how to form a bead with different types of acrylic powder.
How to Prepare a New Acrylic Brush for First Use?
A brand-new Kolinsky brush comes with resin in the bristles. This helps the hairs retain their shape. But you must remove the resin before using the brush for acrylic nail designs.
Use clean fingers to massage the bristles and break up the resin. This will take a few minutes.
Then, submerge the bristles in the monomer. Press the brush against the bottom of the dappen dish to remove air bubbles and leftover debris.
Extract the brush and press out the excess liquid on the edge of the dish. Wipe the bristles on a clean paper towel and repeat the process three more times.
Dispose of the dirty monomer properly. The easiest way is to sprinkle acrylic powder and let it harden before throwing it in the trash. But please check local regulations regarding the safe disposal of acrylics.
Now, you're ready to use the new brush. Otherwise, you can lay it flat to dry before putting it away.
Conclusion
We hope these tips on how to crimp acrylic nail brushes helped you today. While you're here, check out our new arrivals to see what’s trending in the nail world. We also invite you to take advantage of our deals and stock up on acrylic supplies and more.
Remember, we offer free delivery and complementary gifts for orders over $100!